You know that satisfying *click* when you drop a tile sample and it doesn’t chip? That’s the quality click. I learned that the hard way after spending a weekend chipping the heck out of my first bathroom floor. The tile I picked was a cheap ceramic that looked great in the store, but turned into a cracked mess after six months of real use.
I’d lived in my flat for a little over a year when I decided that the ugly beige builder-grade tiles needed to go. Not only were they ugly, they were also depressing. Every morning, stepping onto that cold, dead tile floor felt like starting the day with a small loss. So I did what any normal person would do – I headed to the tile shop with a budget of £200 and big dreams.
The tile shop salesperson (thank you) suggested I get porcelain. “It’s an investment,” she said, showing me examples of tile that cost three times my budget. I smiled nicely and headed straight to the clearance section. Those shiny ceramic tiles were basically calling my name – deep blue with a little gold vein running through them, 70% off. What could possibly go wrong?
A lot, it seems. In a matter of months, tiny cracks began popping up. The grout turned a suspicious gray-brown color no matter how often I cleaned it. And when I dropped my hair straightener? Three tiles broke like they were made of candy.
Fast forward to my current bathroom remodel, and I’m singing a whole different song. After that first disaster, I became mildly fixated on tile quality – not because I have a sense of pride, but because I genuinely hate spending my weekends with a chisel and a box of broken ceramic.
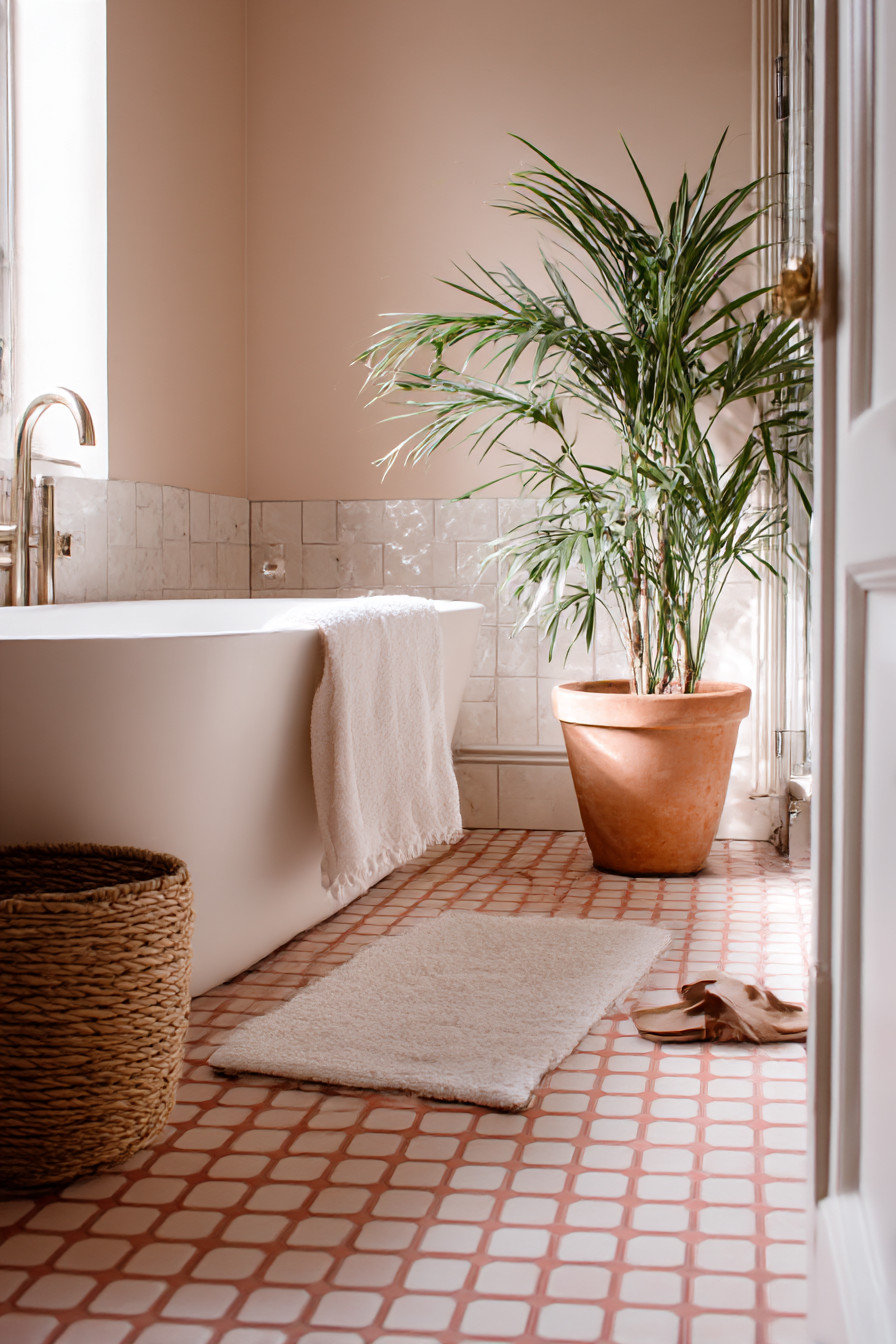
Tile quality begins with the tile itself. While porcelain tile may cost more to start, it is fired at a hotter temperature, resulting in a tile that is more dense and less porous. This is not just a bunch of technical terms – it means the tile will not soak up water, create a stain from a dropped tube of mascara, or crack when something heavy falls on it. My current bathroom floor has withstood a dropped perfume bottle made of glass, weekly mopping with whatever cleaning solution I happened upon first, and my habit of practicing yoga moves on the floor while waiting for my hair mask to work. It remains flawless.
However, the fact that nobody tells you about tile installation – that the actual placement of the tile is as important as the tile itself – surprised me. I learned this lesson when I paid my cousin’s buddy who “does some tile work on the side” to install the tile. He got me the tile I wanted at a lower price, correct? No, he didn’t. The tile itself was nice mid-range porcelain, however, he did not properly waterproof behind the shower and applied the wrong adhesive to the floor. Six months later, I had loose tile and water damage.
When I tore it all apart and reinstalled it properly, I spent more money on the tile installer than I spent on the tile itself. Worth every penny. A good tile installer does not simply lay tile down. He prepares the surface, applies the necessary underlayment, lays the waterproof membrane behind the shower, knows which adhesive to apply depending on the type of substrate underneath, and allows the floor to cure for 48 hours before applying the grout. Mine actually demanded I allow the floor to cure for 48 hours before grouting. At the time, I thought he was being overcautious. Today, three years later, it still looks like I installed it yesterday.
Shower wall tiles are especially noteworthy, as that is the area where most DIY projects go horribly wrong. I originally intended to install subway tiles. Classic. Affordable. How difficult can it be? Very difficult, it turns out, when you’re attempting to keep lines straight while working on a vertical plane in a confined space. However, what is far more significant, is that shower walls constantly endure moisture. The same inexpensive ceramic tile I swore I would never buy again? Would have been disastrous here. Absorbing all the steam, ultimately growing that disgusting fuzzy mold that you can never seem to fully remove.
Therefore, I chose large format porcelain tile with the least amount of grout line possible. With fewer grout lines, fewer crevices exist for moisture to enter and mold to develop. While the installer worked more quickly (fewer cuts, fewer tiles to lay), the cleaning process takes literally half the time. I can thoroughly clean the entire shower with a squeegee and a microfiber towel in two minutes.
Installing tile on the floor brought its own set of problems. I wanted something that would look interesting but not be slippery when wet. Because nobody wants to sustain a head injury due to their morning routine. Textured porcelain seemed ideal until I realized that texture also provides a place for hair and soap scum to hide. After a considerable amount of deliberation (okay, borderline obsessiveness), I finally settled on smooth porcelain with a slightly textured grip surface. Just enough traction to make me feel secure, but not enough to entrap dirt.
Grout selection became a full-fledged research project. Standard cement grout looks fantastic at first but requires frequent sealing and stains easily. Epoxy grout is more expensive and is thicker than standard grout (it goes on like thick peanut butter), but it is completely impervious to water and stains. My installer told me that epoxy grout is harder to work with, meaning increased labor costs, but seeing him wash the extra grout off with nothing but water, while cement grout required scrapping with a brush convinced me to choose it.
Choosing a color took forever. I changed my mind somewhere in the neighborhood of seventeen times between classic white, warm gray, and that amazing charcoal that looked elegant in the samples. I finally chose a medium gray that hides the soap scum but is light enough that I can see every water spot. Functional? Yes. Glamorous? Maybe not. But I wouldn’t trade it for anything now when I’m cleaning.
Three years later, my bathroom still looks like it was remodeled today. My friends compliment me on how clean and new everything looks, assuming I’ve just completed a remodeling. The tile has not chipped, cracked, or stained. The grout has not changed color or grown any unusual growths. Even the areas surrounding the toilet (which we all know is the area of the bathroom where the worst of the battles occur) clean easily and have not permanently discolored.
Did my bathroom end up costing more than my initial budget? Yes. Was it worth the added stress, time, and expense of having to tear everything back out and reinstall everything when the cheap tile failed? Absolutely. Plus, I find it enjoyable to begin each day in a space that is solid, clean, and well-designed.
Some people ask if I ever regretted spending so much money on “just tile.” I tell them to consider how many times they’ll use the bathroom each day, how long they intend to reside in the home, and if they want to deal with maintenance issues or if they want to enjoy their space maintenance issue-free. Quality tile isn’t just about aesthetics, it’s about peace of mind.