Okay. I think i made one of the smartest decisions of my life (well, at least for the last Three years) — and that was to try to fix-up a super-depressing guest bathroom. At the time, i’d seen tons of pictures of “that perfect farmhouse style” — you know, those dreamy bathrooms that are just so darn easy-looking? Anyway, i found out the hard way that putting up great-looking shiplap is anything but easy. In fact, it almost became what my girlfriend delicately called “the wooden prison cell”.
Our bathroom was a teeny-tiny space — roughly 5 x 6 feet — that was originally built-in to the flat. From the looks of it, whoever built it thought that beige was a personality type. Everything was builder-quality stuff; there wasn’t a lick of personality anywhere in that room. It was the kind of space you wanted to rush into and rush out of. As a student teacher, i spent my lunch breaks scouring design websites for ideas for decorating our bathroom. One idea kept popping up everywhere: shiplap! Easy peasy, right?
Boy, was i wrong!
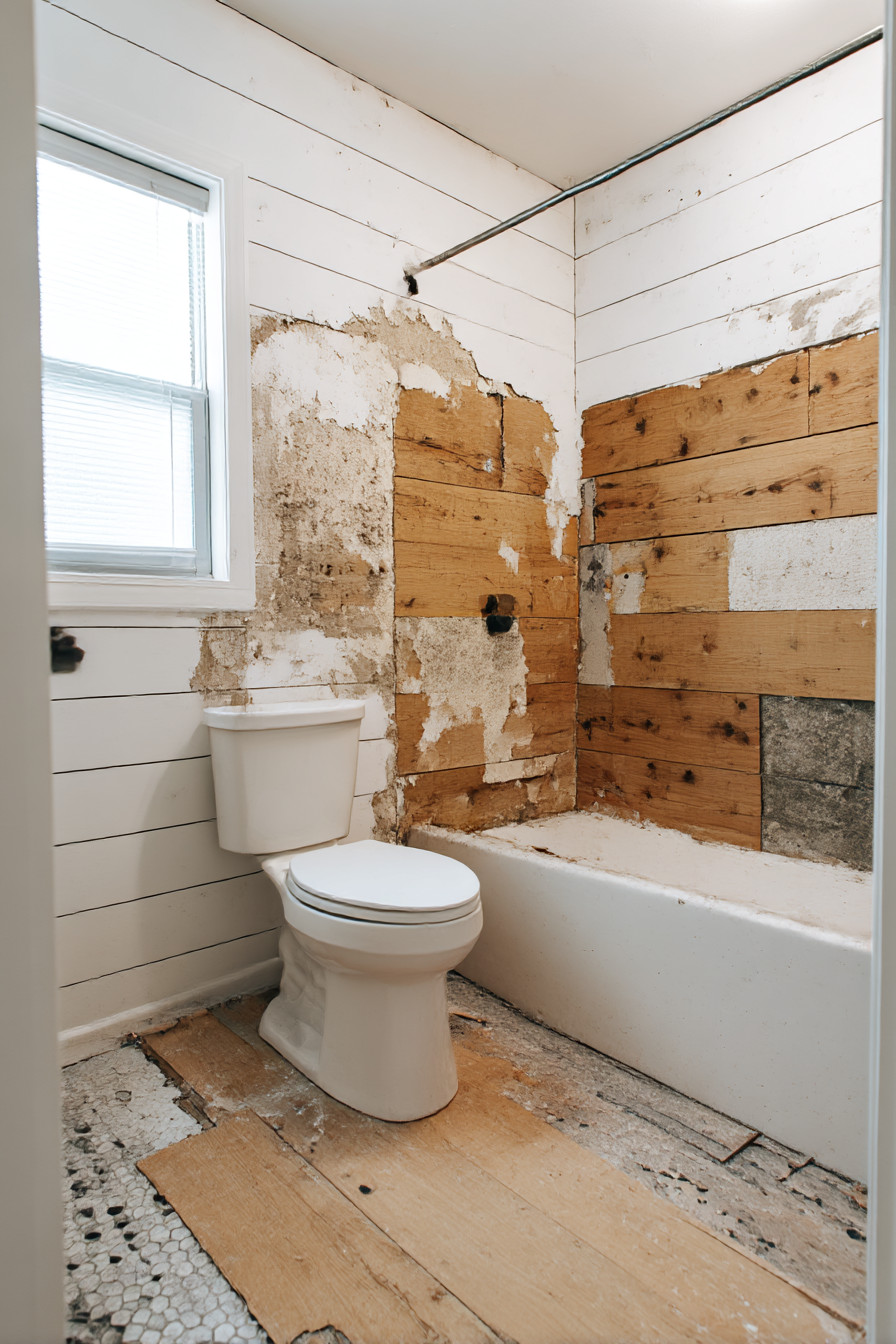
My first attempt at research took place on a Saturday afternoon at B&Q — i walked in there with no clue what i was doing. I was headed directly for the cheap pine planks. A nice gentleman (who turned out to be a lifesaver) stopped me and asked what i planned to do with them. When i told him about the bathroom, he just shook his head and said, “you’re going to install untreated wood in one of the most humid rooms in your home…not good.”
It seems that wood and bathrooms have a complicated history. Who knew?! Everyone except for me apparently. If you want to use real wood, you’ll either need something like cedar that will hold up to moisture or you’ll need to apply layers and layers of sealant. Everything needs to be coated including the front, back and all edges. Just the marine-grade sealant itself costs way more than my total budget for the project.
This is when i stumbled upon MDF shiplap boards with moisture-resistant cores. Honestly, at first it felt like i was cheating. Standing there in the store thinking i should be using real wood since that’s what all the blogs show. These boards were approximately half the price of the real wood and they don’t grow and shrink with every hot shower your teenager takes. Once they’re painted, you can barely tell the difference. Sometimes being practical beats out being a purist, you know?!
The height issue drove me crazy. Every picture i’d seen showed shiplap installed from floor to ceiling. Probably because that’s what looks amazing in magazines. However, i’m dealing with a shoe box sized bathroom and i had this weird feeling that installing shiplap all the way around every wall may give the impression of being trapped in a steam room. Therefore, i used something i had learned from our living room renovation: testing it out first with painter’s tape.
That tape test was one of the best decisions ever! Installing full-height shiplap looked ridiculously overwhelming in our small space. Installing traditional wainscoting-style looked too formal somehow — like we were attempting to recreate some Victorian-era mansion vibe in a modern flat conversion. Ultimately, i went with shiplap 4′ tall; this height fit right at our window-line leaving enough space above to paint something that would help create the illusion of having a taller ceiling.
Now, my experience with painting was close to ruining the whole project. Initially, my intention was to use classic white paint (you know, safe choice…timeless…can’t go wrong with white). Except apparently you can go very wrong with white. After i had primed everything and let it sit for a week or so, the whole bathroom felt like a hospital room — sterile and cold, particularly considering our lousy bathroom lighting.
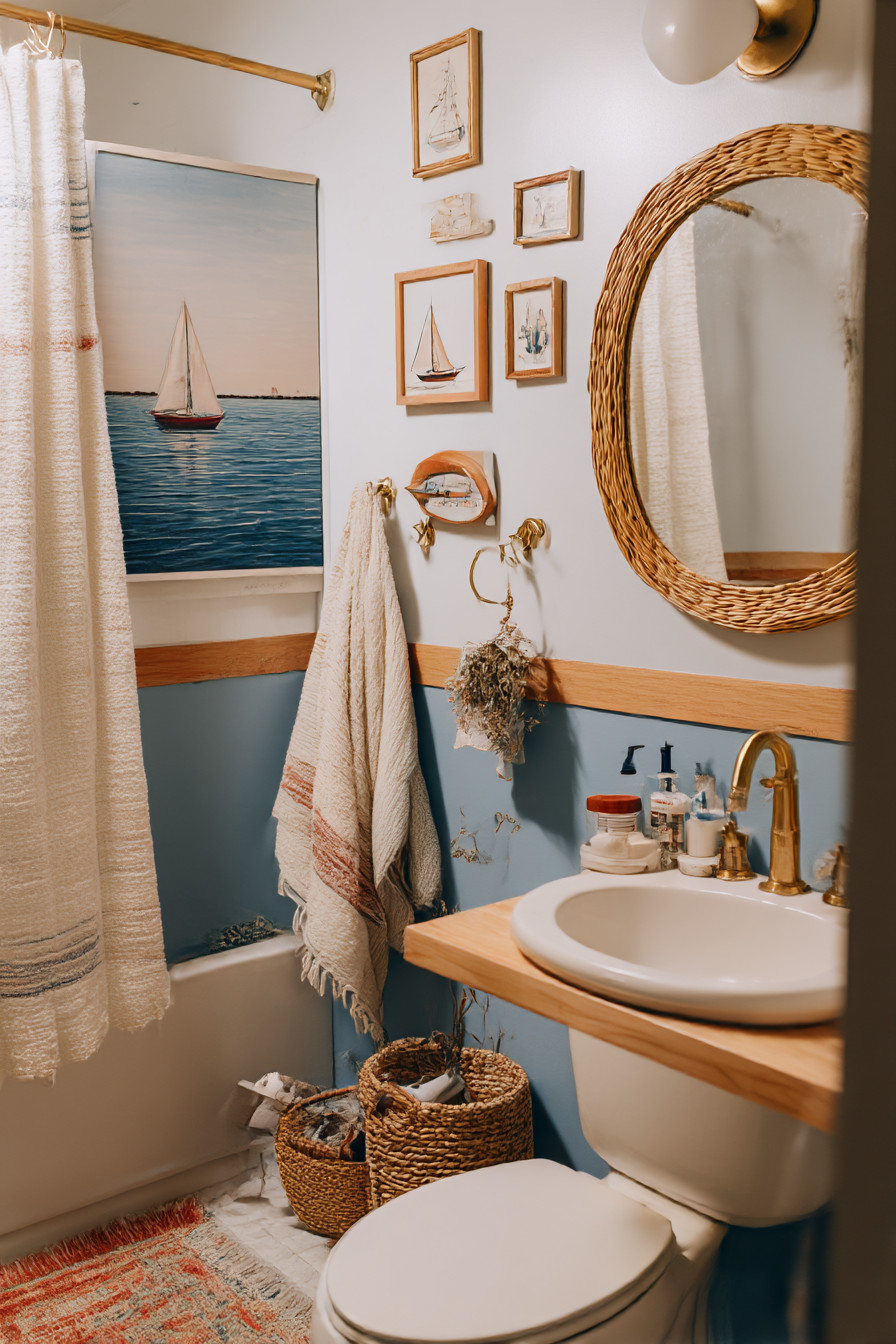
Ultimately, i switched to this warm gray — farrow & ball’s Mole’s breath (which sounds gross but looks beautiful) — and wow what a transformation! Instantly the texture felt cozy vs. Clinical and the color had such depth that you could finally see the shiplap details versus it all washing out under the overhead lighting.
Installing the shiplap taught me quite a lot about myself — namely that my patience wears thin after about 2 hours of precision work. Each board must be precisely level, spaced evenly apart and each joint lined up if you want it to appear as though it was intentionally placed rather than someone threw a few pints down and attempted it.
To accurately align each board, i borrowed a laser level from our upstairs neighbor after my first attempts at using a spirit level appeared crooked enough that even i could tell it was off.
One thing nobody talks about in those design blogs is that if you are doing this in your only bathroom, you essentially become homeless for a weekend. The smell from the primer and paint was awful; everything needed to be sealed properly; then you need to wait for everything to dry/cure before you can even use the space again. Unfortunately, i locked myself out of our downstairs toilet for an entire day because i underestimated how much longer the sealant needed to cure.
For finishing touches, i simply attached this plain wooden trim at the top of the wall where the shiplap meets the painted wall above. Nothing special here — just a basic piece of lumber with slightly rounded edges. This helped cover any slight imperfections with my board placement (and yes, there were some) while adding a final touch to finish the job off. Sometimes, it’s the simplest solution that saves your bacon.
Three years later, that bathroom still makes me smile every time i pass it by. It has character without looking like we transplanted an old barn into our flat. There is texture without busyness; and it feels inviting and warm as opposed to a holding area/room.
People always comment that our flat appears “more complete” now and that is exactly what we set out to accomplish.
What i learned from this experience is that shiplap works best when it adds interest to the space rather than dominating it. When it is done correctly, people will comment on how the room feels rather than immediately thinking “oh they put wood on the wall”. It becomes part of the ambiance rather than the focal point.
In retrospect, perhaps i would have avoided some stress if i had done more research initially as opposed to jumping headfirst into this project based on my enthusiasm and credit cards. But some of the best lessons come from trial and error when you’re working with a teacher’s budget and don’t have enough money to hire professionals for every aspect of the project